Active Directory Single-Sign-On for the Web Portal
Overview
Active Directory Single-Sign On allows users of the web portal to
automatically be logged into the HelpMaster Web Portal based on their Windows
credentials. This means that the user can bypass the regular logon screen
and/or simply click the "Sign in with Active Directory" button at the logon
screen.
Prerequisites
In order for Active Directory login to work, the following conditions
must be met:
- The HelpMaster Active Directory service must
be installed, configured and operational
- All potential users of the web portal must have first been
synchonized/created via an Active Directory
synchronisation profile
- The web portal has been configured to accept logins from your domain
Configuration
Once the HelpMaster Active Directory service has been installed, configured
and a successful synchronization profile has run, perform the folloiwng steps:
- Open the HelpMaster Desktop edition as an administrator
- Select the Web menu, and click the Web Settings
button, then the Web Logins tab
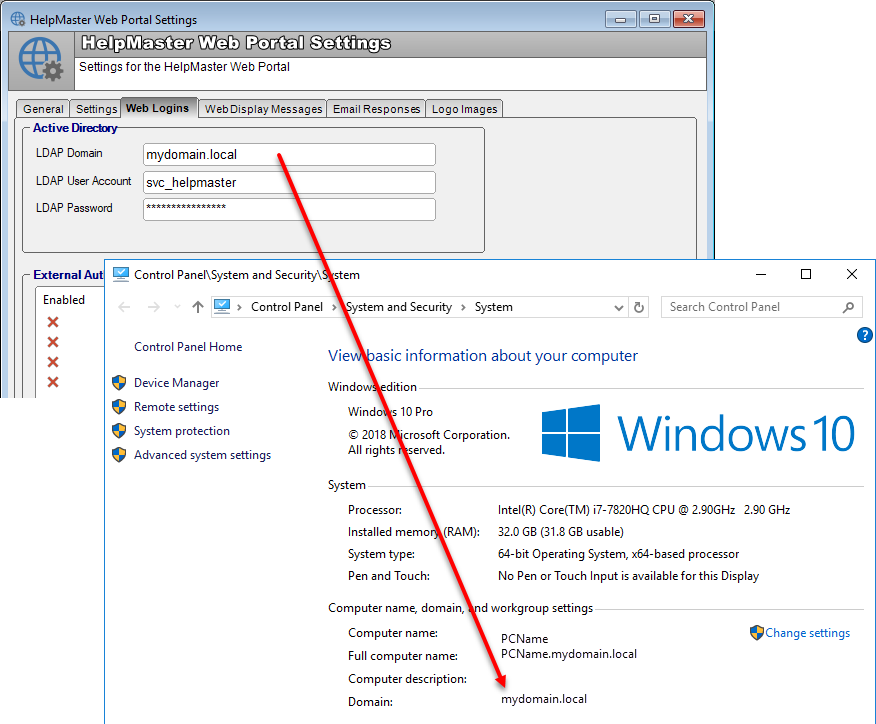
- Enter the name of your domain in the LDAP Domain text
box, as well as the credentials of the HelpMaster Service Account being
used. To find the correct domain settings, check the Computer
Properties in the Control Panel.
- Restart the IIS Application Pool << Important!
Use
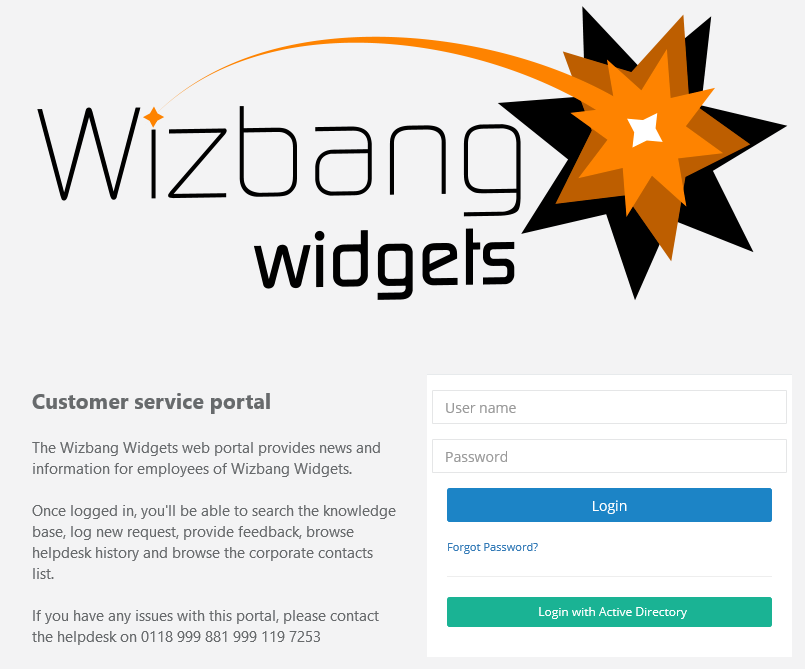
After configuration, an Active Directory credential login can be performed the following three different ways:
- By simply clicking the "Login with Active Directory"
button
- Entering your regular Windows login credentials into the "User name"
and "Password" fields or
- Browsing directly to this URL:
http(s)://[Hostname]/winlogin/hm.login (Replace [Hostname] with your
real site]
Configuring the browser to allow Windows Integrated Authentication
By default, the browser that you use may not allow a users' Active Directory
credentials to be passed through the browser to a web server. This is
common for Internet Explorer, FireFox and Chrome. The following settings
should be set on each computer that will be using the HelpMaster web portal with
Active Directory authentication. This can be performed via Windows Group
Policy, or similar.
Internet Explorer
- Open Internet Explorer
- Click on the Tools icon, select 'Internet
Options' and click on the 'Security' tab,
- Click on the zone being used (or "Trusted Sites" for "Internet"
zone) and then click the "Sites" button (and then
"Advanced" if modifying the "Local intranet" zone)
- Add your HelpMaster server name and IIS Host Name e.g. 'webserver'
and/or FQDN e.g. 'webserver.domain.com.au' to the 'Websites:' list
- Now click on the 'Custom level...' button and
scroll to the bottom of the 'Settings' list
- Under 'User Authentication'>'Logon', select the 'Automatic logon
with current user name and password' option. The default setting 'Automatic
logon in Intranet zone' will only work if the zone being used is the "Local
intranet" zone so change this if Internet access is granted to the
HelpMaster Web portal.
Firefox
- Open Firefox
- In the address bar type 'about:config" and press enter
- In the filter, type "auth" and press enter
- Locate the entry 'network.automatic-ntlm-auth.trusted-uris'
- Double click on this entry and add the HostName to the "Value" property
where HostName is either the machine name or the designated IIS [HostName]
of the Web Server serving the HelpMaster requests. For example, if the web
portal is hosted at https://support.prdsoftware.com, add
'support.prdsoftware.com' to the list. Multiple items may be added using a
comma (,) separator.
See also
Active Directory Integration with HelpMaster Windows Modules
Determining which version of Microsoft IIS you are using